Showing posts with label DotNet. Show all posts

Customizing ASP.NET Core Identity Razor Pages via Scaffolding (in an MVC app)

If you are trying to add the built-in ASP.NET Core Identity Authentication scaffolding to an MVC application, you will notice that traversing between MVC controller actions and simple requests to Razor Pages doesn't work as transparently as you might expect.

To scaffold the Identity Razor Pages so that we can customize them, we first do the following:

Right-click the project and select, "Add >> New Scaffolded Item..."


Select the Identity scaffolding template


From the next screen, select the Razor pages that you would like to scaffold for overriding/customizing


Once you have the scaffolded pages you will need to run this from the Developer console to generate the necessary ASP.NET Core Identity database tables: dotnet ef database update

If you want to be able to get to the Login page from an MVC controller, you will; need to an [AllowAnonymous] attribute to the Login.cshtml Razor Page code-behind class, and you will need to call the Login page while referencing the Area path in which it is located within the project file structure.

The folder structure for an MVC project overriding the built-in Identity auth Razor pages via scaffolding


An MVC logout link that you want to redirect to an overridden Identity auth Login Razor page might look like this in your _Layout view: 

The view link in the MVC's _Layout.cshtml

The controller redirect (note: new { area = "Identity" }); "/Pages/" is ignored for some reason..

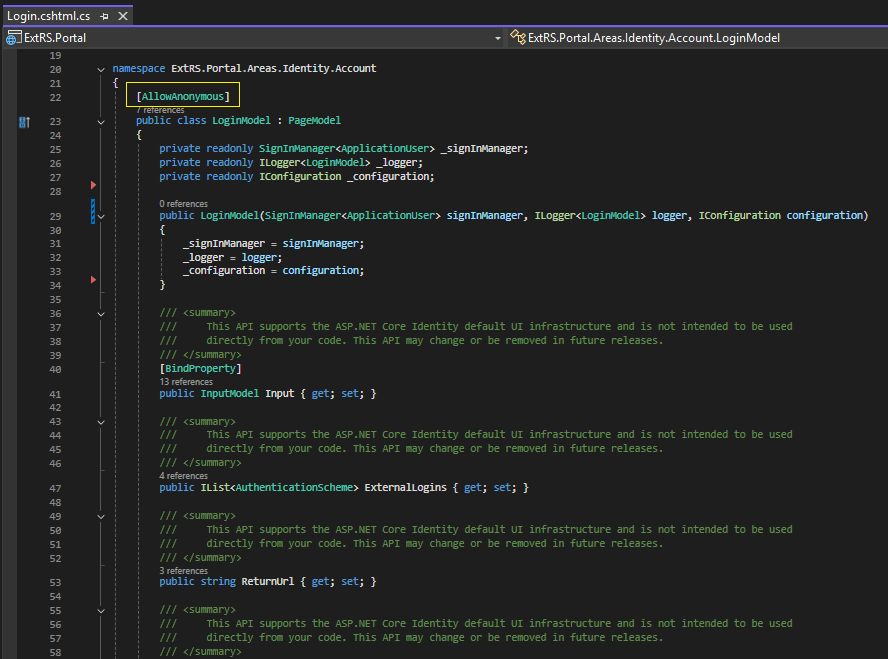
In order to reach the Login Razor page (when not being authenticated) you will need to add the [AllowAnonymous] attribute to the LoginModel class a la:

With [AllowAnonymous] users will be able to reach the overridden Identity Login page from any controller action in your MVC application


An that's it. You can customize all of the front-end and back-end code of the scaffolded Identity Razor pages. This is an example of customization that uses the extRS service to create SSRS user accounts when a user registers a new Identity account for the app:

Scaffolding the Identity Razor pages allows you focus only on the authentication design and logic that you need to customize 


I'm not sure why but much of this is not documented (and what is documented is not easily found).

Lastly, do keep in mind that in order to override certain items like "_LoginPartial", you need to rename to view, as was done with "_LoginPartial2.cshtml" in the extRS project, for example.


References: 

https://github.com/sonrai-LLC/extRS/tree/main/ExtRS.Portal

https://extrs.net


ASCII art fun with .NET

My friend Benn with a nice largemouth bass

And here we have a simple function. Many thanks to its originator, Thinathayalan Ganesan.

You can find this in the Sonrai.ExtRS Nuget project under Sonrai.ExtRS.FormattingService.ConvertToAscii(Bitmap image) and see how it is used in Sonrai.ExtRS.FormattingTests.ConvertToAsciiSucceeds.

I talked a bit about how ASCII art works in a post on a similar Python script.

  // credit (Thinathayalan Ganesan): https://www.c-sharpcorner.com/article/generating-ascii-art-from-an-image-using-C-Sharp  
  public static string ConvertToAscii(Bitmap image)  
  {  
    string[] _AsciiChars = { "#", "#", "@", "%", "=", "+", "*", ":", "-", ".", " " };  
    Boolean toggle = false;  
    StringBuilder sb = new StringBuilder();  
    for (int h = 0; h < image.Height; h++)  
    {  
      for (int w = 0; w < image.Width; w++)  
      {  
        Color pixelColor = image.GetPixel(w, h);  
        //Average out the RGB components to find the Gray Color  
        int red = (pixelColor.R + pixelColor.G + pixelColor.B) / 3;  
        int green = (pixelColor.R + pixelColor.G + pixelColor.B) / 3;  
        int blue = (pixelColor.R + pixelColor.G + pixelColor.B) / 3;  
        Color grayColor = Color.FromArgb(red, green, blue);  
        //Use the toggle flag to minimize height-wise stretch  
        if (!toggle)  
        {  
          int index = (grayColor.R * 10) / 255;  
          sb.Append(_AsciiChars[index]);  
        }  
      }  
      if (!toggle)  
      {  
        sb.Append("\r\n");  
        toggle = true;  
      }  
      else  
      {  
        toggle = false;  
      }  
    }  
    return sb.ToString();  
  }  

The key is the assignment, pixel-by-pixel, of values to the reb, blue and green variables (and then "grayColor" variable) under the comment "Average out the RGB components to find the Gray Color". By getting the average of all colors in the pixel you can get the grayScale RGB color from Color.FromArgb(R, G, B). This grayscale RGB color is then used to select the appropriate ASCII character to represent the shade of gray in each pixel of the image.

  • A darker pixel of an image will use an ASCII character like a "." or "-" or ":".
  • A lighter pixel of an image will use an ASCII character like a "#" or "@" or "%".

In this way we can easily convert an image from its pixel-based source representation to an ASCII character representation. Essentially, a computer image is just a mosaic, or a composite of parts (pixels usually, sometimes ASCII characters- for art and fun!). 😃


Reference: https://www.c-sharpcorner.com/article/generating-ascii-art-from-an-image-using-C-Sharp